Thursday, December 18, 2008

Understanding Your Tanks Cycle


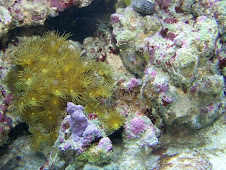
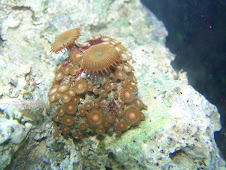
As mentioned previously when you start your new tank you will go through whats referred to as a cycle this is the building block to the Eco system you are going to try to keep. It starts with some form of waste introduced to your tank,die off on your live rock(even cured) is usually enough to start this process though some use various additives to speed up the process.
When waste is introduced into the tank it breaks down releasing ammonia,the ammonia is a food source for bacteria which will then thrive and release nitrite and so on each bacteria consuming the other. The final step is when a bacteria called nitrobacter begins to thrive on the newly introduced nitrite,you'll know its present when your nitrate starts rising. Shortly after that the readings I've mentioned will start to decrease as the newly formed ''beneficial bacteria'' keep themselves in check. You'll know your tank is ready when readings are at zero or barely reading.
The entire time you run your tank will be a balancing act to maintain a the proper amount of bacteria,when you overfeed your tank or add new fish you add ''load'' to your tank,your tank will likely then enter a sort of mini cycle which typically lasts 2 weeks but can take up to a month which is why I stress the important of not adding too much too fast. When the initial cycle is over you can help keep things in check with water changes of around 15-25% in time you'll figure out for yourself how often and what water quantity needs to be changed,I've seen well established tanks that didn't need any.
In summary a healthy tanks water parameters are 0nitrate,0nitrite,0ammonia and zero phosphates. Even low amounts of these are detrimental to fish and corals,if these levels rise after initial cycle and you haven't introduced ''load to your tank this indicates a good time to do a water change or add further filtration.
An important note is not to use tap water for a saltwater tank for it is full of the things your trying to keep out including some heavy metals,reverse osmosis is highly recommended.

Preparing Your Tank


Now lets discuss preparing your tank for livestock. The general rule for liverock is to add 1 pound of liverock per U.S gallon. Live rock is available in different states,these are;un cured when rock is removed from water the life begins to die off releasing toxins this process typically last for about a month. Rock still going through this process is called uncured. Cured rock is another type available,simplly it has finished the die off process. The last type is called dead rock,it has no life on it what so ever and typically has been dried for storage,this type can be picked up cheapest but needs to be (seeded) with life from a piece of cured live rock. There are also man made live rock,one brand of these is called eco rock again these types need to be seeded.
There are two ways of thinking as far as substrate goes,adding sand will give you added biological filtration as well as a place for critters to dwell,some species of fish require a sandbed for various reasons so thats something to consider when making this decision.
Others swear by the barebottom method,this method makes it easier to clean the waste material from your tank and some believe its a cleaner look than sand. A dirty sand bed can be a breeding ground for toxins but I personally suggest starting with a sand bed until you get a feel for caring for your tank because of the added filtration value of the sand. You can go as deep or shallow with your sand as you like,personally I like the deep bed method 4'' of sand,you'll get the best biological production this way.

Now we are ready for water (YAY) the tank needs to be filled with reverse osmosis water (ro) either via an ro/di filter unit (recomended) or via bottled water. Put in your powerheads and heater. Bring your salinity up to the proper level of 1.023-1.025 using a hydrometer or preferablly a refractometer. Then adjust your alkalinity to between 8 and 11 using reef builder there are other methods but I suggest this one for beginners. Now you can add your sand and water,the order doesnt matter. When your water temp is right and your tank has clarified you can add your live rock and skimmer/filter.

Now you need to wait for something called a cycle to run its course this takes on average of 30days. IT IS AN ABSOLUTE MUST to cycle your tank. During this process your tank is building beneficial bacteria and leeching pollutants ie;nitrate,ammonia,nitrite and phosphates.
There are hundreds of methods for cycling a tank and speeding up the process I'll leave the method up to you. Regardless the endpoint should be 0 or very close to on all the chemicals I mentioned. Once your cycle is finished you can add your clean up crew (crabs and snails) and 1 fish. Each time you add a new fish you should let your tank mini cycle for 2 weeks before adding another as your tank needs to develop extra bacteria to handle the load of the new fish. Adding too many fish too fast will over tax your tank and cause toxins to skyrocket.

This concludes the build section of my blog,if you have any questions or concerns..or just want to point out an error I've made please feel free to post. There are hundreds of methods and opinions on reef keeping but I believe this is the best safest way for somebody to begin,save the advanced techniques for when you get a feel for caring for your tank.

Next time I will highlight some good starter corals and fish,as most corals and fish need an established tank which you dont have yet.

Tuesday, December 16, 2008

Monday, December 15, 2008


Hello and welcome to my blog on reef keeping. So you want to get into saltwater reefkeeping but don't know where to start? Lets start at the beginning.
DECIDING WHAT YOU WANT TO PUT IN YOUR TANK
A commonly overlooked place to start. There are basically four types of saltwater aquarium setup,lets go through them; 1.Fish only tank with liverock,2.Soft coral tank,3.Hard coral tank,4.Mixed reef. Each of these setups requires different types of equipment in order to be successful.
FISH ONLY WITH LIVE ROCK
The cheapest and probably easiest saltwater tank to keep,it doesn't require strong lighting or the use of a protein skimmer though depending on the ''load'' of your tank you may want to consider using a skimmer or some form of carbon filtration.
SOFT CORAL TANK
Here's a good starting point for reef keeping. You will require a stronger light than as with a fish only tank,carbon filtration,stronger current and though you still don't need a protein skimmer it's advised that one should be used in the place of a traditional filter. Also a good time to consider a sump tank which we will discuss later.
HARD CORAL/MIXED REEF
Most hard coral requires very strong lighting either t5 fluorescent or metal halide. In addition to strong lighting they require very strong flow around 20x the tank capacity per hour at the very least. A protein skimmer is an absolute must for water conditions need to be PERFECT. Some other equipment worth considering are;phosban reactors,zeovit systems ,sumps or any other equipment designed to improve water quality.


Ok now you've figured out what you want to keep,lets talk about the pieces that make it all work.
LIVE ROCK
This is the main source of filtration for a saltwater tank. The pores in the rock contain beneficial bacteria that eats the bad things in your tank such as the chemicals released in the decomposition of waste. Not to mention they host all sorts of interesting little creatures,give your fish a place to hide and something to attach corals to.
LIVE SAND (aragonite)
The same benefits as live rock,also gives burrowing fish and snails somewhere to dig.
PROTEIN SKIMMER
This will remove waste both liquid and solid entirely from your tank into a collection cup so as not to overwork the bacteria in the sand/rock.
LIGHTING
Fish only tanks can use compact fluorescent with the color rating 6500k-10000k with or without the actinic bulb(blue bulb) Soft coral can also be kept with compact fluorescent,actinic use is advised. Soft coral growth rate will be greatly increased though with the use of t5 fluorescent which is brighter. Many common species of soft coral dont do well under intense lighting,so a midrange product here would be a good way to save money.
Hard coral on the other hand require very strong light metal halide,t5 and even new technology L.E.D fixtures are most commonlly used,though LED is still a new technology which has its sceptics. Using weak lighting will cause stunted growth,color loss or browning and even death in light loving species of coral.
SUMP TANK
Kept bellow or beside the main tank and connected together via a pump and an overflow. The idea with the sump is to add aeration,give pods(live fish food)a safe place to hide and a great place to put your bulky equipment out of view. Alternating the light cycle between your display and sump also helps to stabilize your PH level.
REACTORS
A reactor is a tube filled with carbon or phosphate removal media,with a small pump to push the water through the tube. This removes anything the live rock and skimmer cant including odor. A calcium reactor efficiently puts calcium and magnesium into your tank,only practical for tanks over 100g
POWER HEADS/WAVE MAKERS
Circulation is the key and these are what you use to accomplish this. Current will help food stay up off the ground where your filtration can remove it,slows algae growth,helps some corals shed their mucous layer and helps add aeration. Current will also help your corals grow stronger.
HYDROMETER/REFRACTOMETER
Measures the amount of salt in your tank(salinity). 1.025 is ideal for a reef 1.023 is ideal for fish only.
There are many other pieces of equipment but these are the basics,in time you can make your own decision what more you would like to add.

Next post we will discuss preparing your tank for Livestock
Now you know what kind of tank you want and the equipment you need,you will have to research what goes with what,some fish eat coral and some coral eat fish lol